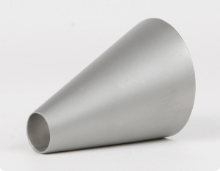


- Butt welding fittings
- bends
- T- X- Y- pieces
- T- and Y-bends
- reducers
- caps and heads
- collars
- branch saddles
- orbital fittings
- ANSI / ASME
- Industrial valves
- ball valves
- actuators
- drain cocks
- gate valves
- globe valves
- non-return valves
- Y-strainers
- control technology
- Flanges
- welding neck flanges
- threaded flanges
- blind flanges
- plate flanges
- loose plate flanges
- collars
- flange-fittings
- ANSI/ ASME
- other
- Systems
- TEEKAY
- Victaulic
- press fittings
- quick couplings
- clamp connections
- cutting rings
- DIN 11864/ DIN 11853
- railing construction
- Beverage fittings
- unions
- fittings
- pipe clamps
- Tri-Clamp
- valves & cocks
- flange connections
- inspection glasses
- filter & strainers
- spray balls

decoration tube, polishedGR.


decoration tube, polished welded, EN 10296-2 Tol. EN 1127, not annealed
Welded decoration tubes
acc. to. EN 10296-2/ EN ISO 1127 old DIN 17455/ DIN 2463)
in manufacturing lengths of 6 m
Tube microsections
Tube microsections are not stipulated by any standards. It is customary to state the grain sizes,
e.g. grain size 240 or 320, etc. Only roughness can be measured using a roughness tester.
However, visual variations from plant to plant are possible and can sometimes even be detected
within the same batch. Severe deviations between the longitudinal sections on sheet metals and
square tubes. Furthermore, radial sections on round tubes are possible.
Imperfections in the ground surface are only considered to be flaws if they can be seen by the
naked eye at a distance of one metre and greater.
| Grain size | Roughness depth (Ra) |
|---|---|
| 180 | 3,0 to 2,0 my |
| 240 | 1,5t o 1,0 my |
| 320 | 0,8 to0,5 my |
| 400 | 0,4 to 0,3 my |
| 600 | 0,25 to 0,2 my |
| High-gloss polished | 0,2 to 0,08 my |
extended product description
Stainless steel tubes round welded decoration tubes
decoration tube, polishedGR.

Welded decoration tubes
acc. to. EN 10296-2/ EN ISO 1127 old DIN 17455/ DIN 2463)
in manufacturing lengths of 6 m
Tube microsections
Tube microsections are not stipulated by any standards. It is customary to state the grain sizes,
e.g. grain size 240 or 320, etc. Only roughness can be measured using a roughness tester.
However, visual variations from plant to plant are possible and can sometimes even be detected
within the same batch. Severe deviations between the longitudinal sections on sheet metals and
square tubes. Furthermore, radial sections on round tubes are possible.
Imperfections in the ground surface are only considered to be flaws if they can be seen by the
naked eye at a distance of one metre and greater.
| Grain size | Roughness depth (Ra) |
|---|---|
| 180 | 3,0 to 2,0 my |
| 240 | 1,5t o 1,0 my |
| 320 | 0,8 to0,5 my |
| 400 | 0,4 to 0,3 my |
| 600 | 0,25 to 0,2 my |
| High-gloss polished | 0,2 to 0,08 my |
This view is not optimized for mobile devices.
You can change back to desktop view.
This view is not optimized for mobile devices.
You can change back to desktop view.


